This is a guest blog post from first-grade teacher and How Light Travels author Lyssa Sahadevan.
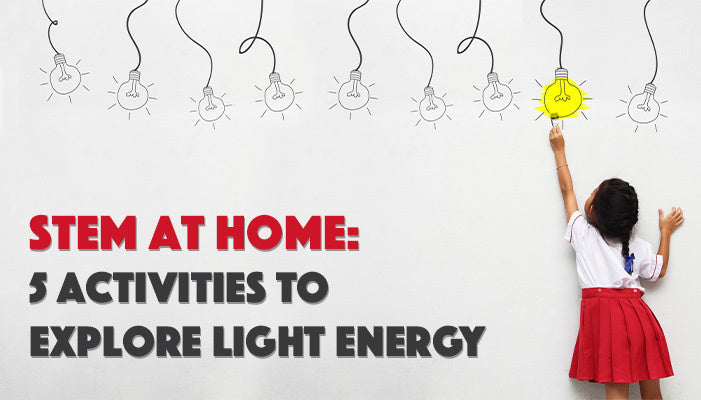
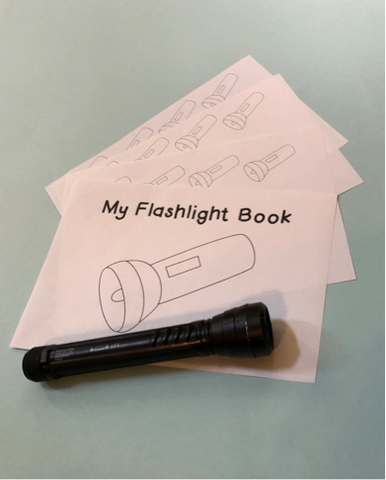 Today, we are sharing some easy hands-on activities that will allow your K–2 students to explore light, using materials that can easily be found in the home! Start by downloading and printing the free Flashlight Book. This is the perfect place for kids to note their thoughts and observations while they perform these activities. They will also need a flashlight. If you do not have a flashlight available, the flashlight app on a smartphone will work too. Light is a type of energy that allows us to see and interact with the world around us. It can move through things. It can travel in different ways when it hits different objects. Light is a cool science concept to explore with young children!
 1. Brainstorm Prompt kids to think about different types of light sources. Ask them questions like, "Where do we get light?" or "When do you notice light the most?" Encourage them to draw pictures or make a list in their Flashlight Book of all the light sources they notice. Then ask them how they use light in their everyday life: inside, outside, in the car, at a grocery store, etc.
2. Light Hunt
Now that they have thought about the different types of light sources and the ways they use light, send them on a light hunt! Have them go around the home on a scavenger hunt, looking for up to ten sources of light. After they complete their quest, sit down with them and discuss whether each item uses artificial or natural light.
Parents can help children begin to understand the difference between the two by asking questions such as these: “Is this light human-made, or does it have a natural source? Is this light source controlled by electricity or nature? Can we turn it off and on?”
3. Traveling Light
 After kids have found different sources of light, they are ready to learn more about how it travels. Typically, light travels in a straight path; however, there are some exceptions that depend on what the light is interacting with. Each item that light interacts with has its own individual qualities, so when each interacts with light, it leads to a different result. As a result of these different elements interacting, the direction and speed of the traveling light wave will change, and the light will appear to bend or change direction.
Kids can see this for themselves by walking around the home and seeing how light interacts with different items, placing each item in the following categories:
- If light passes easily through an object, it is transparent. Clear windows and water are transparent objects.
- If only some light passes through an object, it is translucent. Frosted glass is a translucent object.
- If light cannot pass through an object, the object is opaque. Wood and stone are opaque objects.
After the kids have completed their walkaround, ask them to compare and contrast the items in each category. Parents can guide this with questions like these: "What do these items have in common? What are some physical differences between the items? Could these differences have an impact on how the light interacts with them?" To follow up, ask the child if the similarities or differences they have noted can be applied to all items within the same category (opaque, translucent, or transparent).
4. Shadow Hunt
As kids learned in the previous activity, light travels in a straight line, and when it can’t pass through an object that is placed into the line of light, a shadow is formed. The shape of the shadow can be changed by moving the object closer to or farther away from the light source and vice versa.
How shadows occur is an important concept for kids to understand. Grasping this concept involves a higher level of thinking: they need to understand not only why the shadow appears, but also why it changes based on the physical relation between the item and the light source, which involves introduction to the concept of depth.
Have kids gather an assortment of objects, ensuring that they are a variety of sizes, shapes, and materials. Instruct them to shine their flashlight on each individual object. As they test out each object, encourage them to play with the object’s shadow, seeing if it changes based on the distance from the light. Direct them record their observations in their Flashlight Book. Ask them to consider why a shadow formed or did not form. Tell them to compare and contract the similarities and differences between the objects they choose, then ask how each object’s physical characteristics relate to its shadow or lack thereof.
5. Predicting Light
 For this activity, you will need colored paper, scrapbook paper, or tissue-paper scraps. You might also want rubber bands to secure the paper over the light. Ask, "What will happen if we put paper over the flashlight? Will the light pass through the paper? Will the light change colors or stay the same?" Making predictions is crucial because it allows kids to use their pre-existing knowledge to anticipate what will or could happen. After the kids make their predictions, test them out! If a prediction occurred as expected, have the child verbally explain why their prediction was right. If their prediction was wrong, ask them to explain their thinking, and see if they have a new prediction after experimenting and reviewing.
Light is an essential part of our everyday life and a is a key science topic that children need to comprehend. The more fun, hands-on experiences that educators and parents can provide to help learners understand the properties of light, the better. Have fun with light, and watch your child’s vocabulary and understanding grow!
~~~
 Lyssa is a first-grade teacher and the author of several STEM Explorations books, such as How Light Travels, The Right Tools, All About Bridges, and more! She is a former Teacher of the Year, who has been teaching for eighteen years. Lyssa believes in hands-on learning and keeping it fun!


